Mac USB drive data recovery software helps you to recover your entire deleted data like photos, pictures, ofiice files, audio/ video clipping and other valuable data from USB drive. Following steps helps you to recover lost data from USB drive.
Step 1:
Select the disk from the list from which you want to recover data, as shown in the following screen:
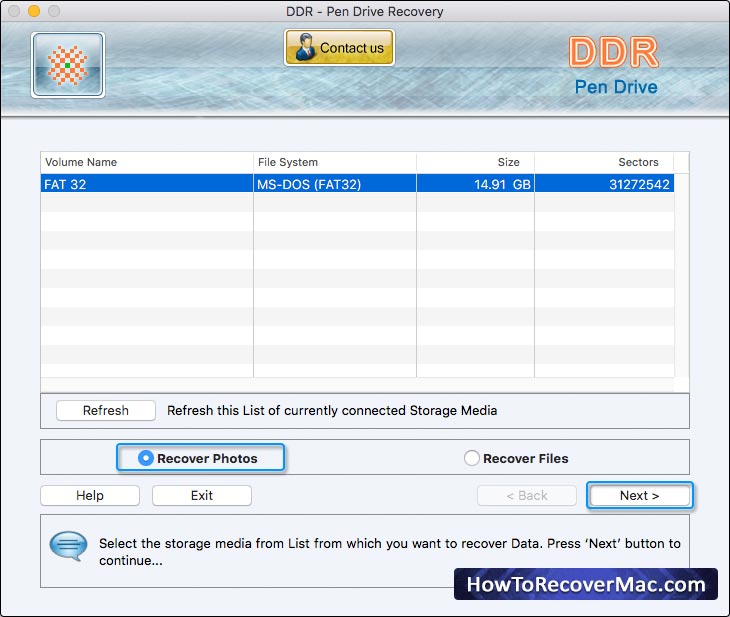
Select the ‘Recover Photos’ option and Click ‘Next’ Button to Continue.
Step 2:
Select the Searching Criteria:
- Entire Disk
- Sector Range
Entire Disk Searching Criteria:
Select 'Entire Disk' Searching Criteria and Browse the Destination path where the recovered data will be saved.
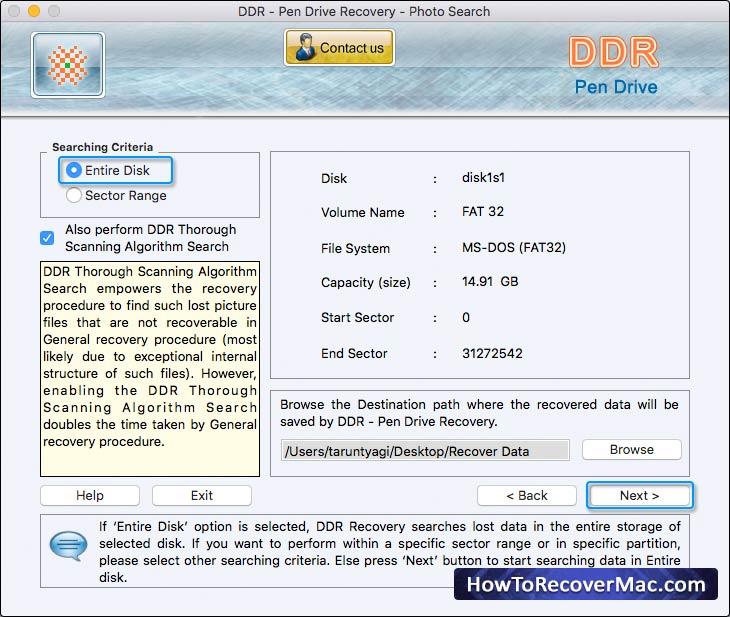
Click ‘Next’ button to start searching data in Entire Disk or else Click ‘Back’ button to go back to previous step.
Info: If 'Entire Disk' option is selected, DDR Recovery searches lost data in the entire storage of selected disk. If you want to perform recovery within a specific sector range, please select other searching criteria.
Sector Range Searching Criteria
Select ‘Sector Range’ Searching Criteria and ‘Browse’ the Destination path where the recovered photos will be saved.
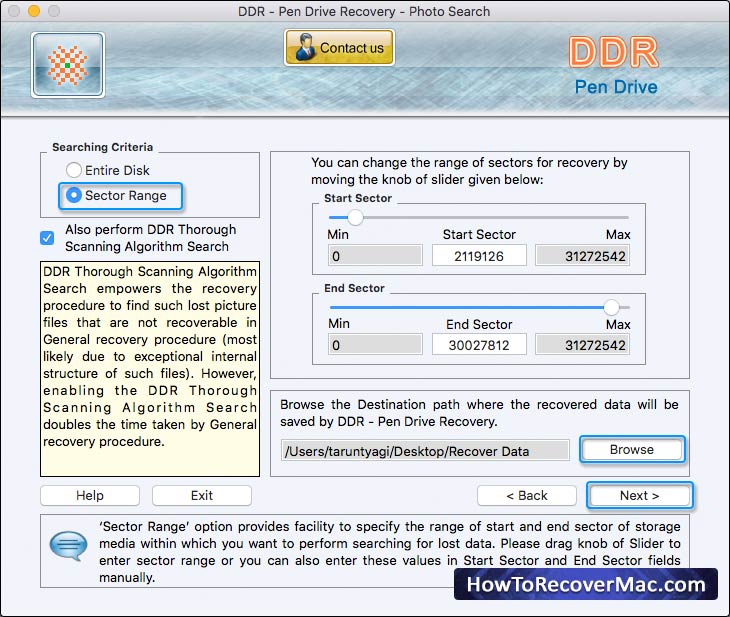
Click ‘Next’ button to start searching data in Sector Range or else Click ‘Back’ button to back to previous step.
Info: ‘Sector Range’ option provides facility to specify the range of start and end sectors of storage media within which you want to perform searching for lost data. Please drag knob of Slider to enter sector range or you can also enter these values in ‘Start Sector’ and ‘End Sector’ fields manually.
Note:
Select 'Also perform DDR Thorough Scanning Algorithm Search' checkbox if you want to scan the disk using Thorough Scanning Algorithm Search (Once after disk is scanned using General recovery procedure) else Unselect the checkbox if you want to scan the disk using only General recovery procedure.
Step 3:
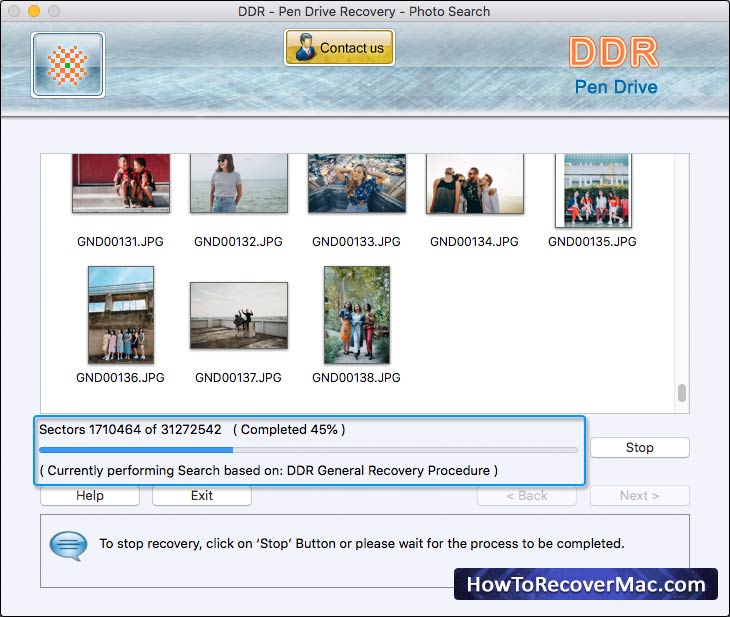
Above screen shows Searching process based on DDR General Recovery Procedure.
Once after Searching of Picture files in specified disk sectors range is completed using ‘DDR General Recovery Procedure’ then automatically searching of Picture files is performed using ‘DDR Thorough Scanning Algorithm’ if you have enabled ‘DDR Thorough Scanning Algorithm’ search (for more details go to Photo Recovery Procedure step 2), where you select Searching Criteria before launching the scanning for recovery.
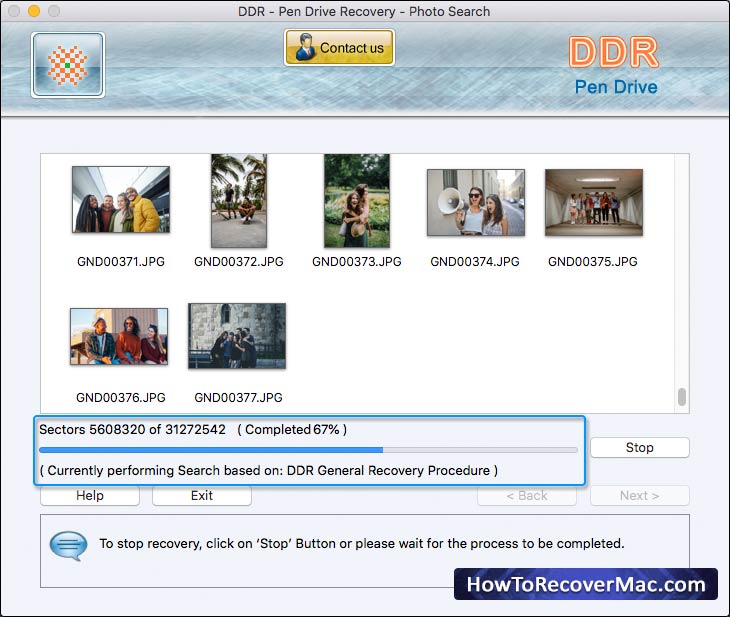
Above screen shows Search based on DDR Thorough Scanning Procedure.
Info:
Among recovered thumbnails, if you do not find the preview of Picture files that you were trying to recover, please use any of the following methods to recover your data:
- Please make sure that you have also enabled the ‘DDR Thorough Scanning Algorithm’ search on the software screen, where you select Searching Criteria before launching the scanning for recovery.
- Please allow every process to be completed up to 100 percent. Make sure that your storage media is connected to your computer properly and you have sufficient user access privileges of your computer to run Software on it.
Note:
To Stop recovery click on 'Stop' Button or please wait for the process to be completed.
Step 4:
Once completing the searching process, the recovered Picture files are displayed as shown in following screen:
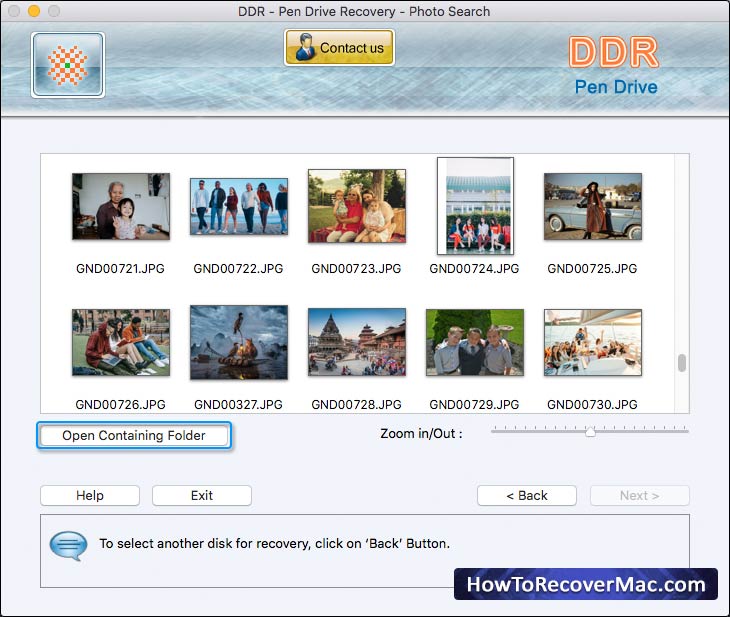
To view the recovered Data, please click on ‘Open Containing Folder’ or else click on ‘Back ‘button to select another disk for recovery.
Note:
You can see the preview of selected image by double-clicking on the image.
Step 5:
On Clicking ‘Open Containing Folder', following screen appears:
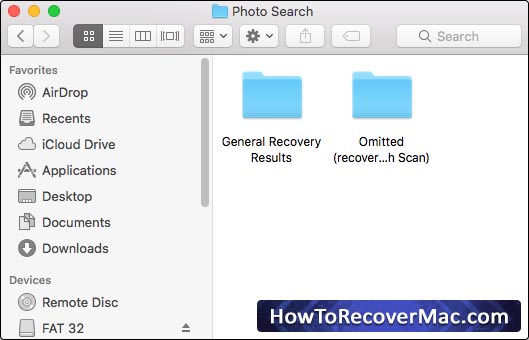
Click on ‘General Recovery Results' folder to view the recovered Picture files using DDR General Recovery Procedure.
Click on ‘Omitted (recovered by Thorough Scan)’ folder to view the omitted recovered Picture files (using DDR Thorough Scanning Algorithm).
Other Related Links:
